How to Test Your Garden Soil At Home with DIY Kits
Have you ever wondered if you know how to test your garden soil? Many new gardeners don't know how to do so and ruin their first planting experience. Soil testing is crucial to help you decide which plant is best for the garden.
How to Test Your Garden Soil in 4 Easy Steps
This method uses a DIY soil test kit that you can get at a gardening store. Albeit being rudimentary, this DIY test is helpful for beginners. And this is how you can use them to test your soil.
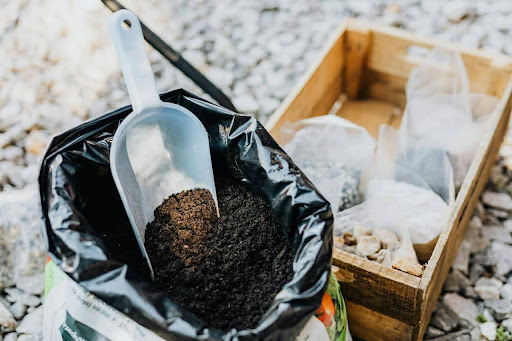
Collect the Soil Use a trowel to dig at least six inches deep in your yard. Ensure the soil is clean from roots, stone, clay, or other lumps. On average, you may only need a teaspoon of soil from each part. But if you have a large ground, you must take samples from all parts.
Combine Them After you compile the soil, mix them in a jar or a container. Your natural oil may affect the pH level, so you should avoid using your hands in this process.
Mix with the Solution Fill the test kit with the soil sample up to the indicator. Open the solution package and pour it on top of the soil mix. Then add water using droplets in the kit until it reaches the dotted line.
Check the Result Shake the kit until the soil and water are all mixed. Let it sit for 1-2 minutes before checking the result. You can match the color with the chart on the kit.
Is There an Easy Way to Do It?
Maybe your general store doesn't have the kit, or you simply can't wait to order them from an online store. You can do basic testing to check your soil condition.
Look for Earthworms and Weeds Earthworm is an indisputable fact that the soil is fertile. They are eating the nutrients from the soil and can grow. So when you find some earthworms when you're about to plant, it means your soil is good enough. Weed is also a good indicator of how fertile the soil is. They take over the soil from the original plant and are proof that the soil has many nutrients inside.
The Peanut Butter Jar Test The test is quite similar to the DIY kit and works great if you have a small yard. Dig your soil down to six inches and fill the jar with soil between 1/3 to 1/2 of the height. Add water until the jar shoulders and close the lid tightly. Give the jar a quick shake and set it down. After 1 minute, measure the sediment at the bottom of the jar. Repeat the measurement after 4 minutes. And again after 24 hours. The first measurement is the amount of sand, and the next one is the amount of silt. The last one is to measure the clay. Calculate the amount in percentage to know the ratio of silt, sand, and clay and understand how healthy the soil is.
Why a Soil Test Is Important
As you know, each plant has different nutrient needs. Several plants prefer soil with more sand, while others will die in clay soil. Knowing the soil pH also can help you measure the nutrients you should give them. With a balanced nutrient, your plants will grow strong and healthy.
Ultimately, you should know how to test your garden soil before starting planting anything. But even if you know it after planting, you still can adjust the nutrients to ensure their growth.
